Young children are naturally curious, fascinated with the world around them and the way things work. As a continuous part of the natural world, the sun is a source of curiosity that presents many playful learning and exploration opportunities for little learners. The impact of the sun’s rays on temperature, light, and shadow opens the door to engaging activities for exploring a variety of scientific concepts. In this article, we share some outdoor STEM activities and experiments that invite children to observe and explore the power of the sun.
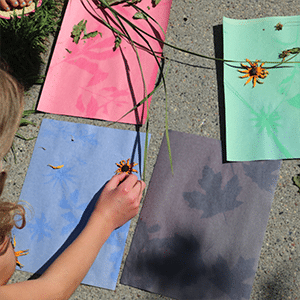
A fun way to explore the sun and the impacts of its light is to make sun prints! This simple activity requires only a few items: blank sheets of construction paper, items found in nature, and plastic wrap. To get started, invite the children to go on a nature walk in your yard and ask each of them to collect some leaves and flowers that have interesting shapes. Then, give each child a sheet of construction paper and help them arrange their selected items on the paper to form an interesting design. Finally, you’ll place a large sheet of plastic wrap over the top of each design. You might want to secure the plastic wrap with tape, and place rocks on the edges of the paper to make sure that they don’t blow away.
Let the plastic wrap-covered designs sit in the direct sun for two to three hours. Then, take the children outside and help each child remove the plastic wrap and nature items to discover that the sun left behind a print of the construction paper designs!
As little ones reveal their final products, you can share that the sun emits ultraviolet (UV) light that causes a chemical reaction in the paper that results in a change to the paper’s color. Invite the children to compare their sun prints to see if some of the paper changed in color more than others.
![]()
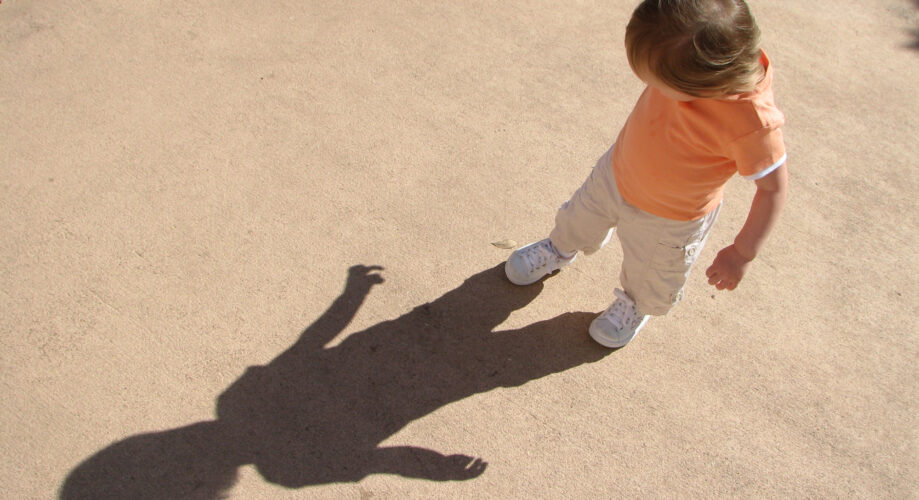
Exploring shadows is a fun way for little ones to learn about the sun and observe the way it moves in relation to the Earth throughout the day. Invite children to stand in an area where their shadows are clearly visible. Encourage them to help one another trace each child’s shadow using chalk. You and the children can repeat the tracing activity at different times throughout the day – and notice together that the shadow locations shift, depending on the time of day. You might even incorporate some early math language by comparing the sizes of shadows, noting the way the sun’s angle can make the shadows bigger or smaller!
As the children observe their shadows throughout the day, you can show them that their bodies are blocking the sun’s rays from getting to the ground – causing a shadow to be made on the sidewalk. You might also have conversations about how the Earth’s rotation changes the way the sunlight hits the Earth, which in turn causes their shadows to change.
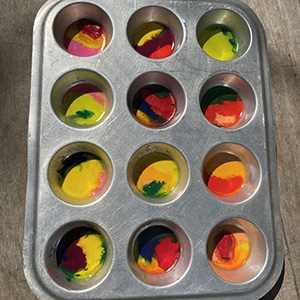
This simple experiment is a great way to use up small pieces of broken crayons that you might have lying in your art supply containers. All you will need is a cupcake baking tin and broken crayon pieces! You can also use muffin liners, if you’d like.
You will need to do this activity on a hot day (above 90℉). To get started, place the broken pieces of crayon into the cups of the cupcake tin. You can invite little ones to help with this step and to have fun being creative with color combinations. Then, place the cupcake tin in the direct sun during the afternoon, when the temperature is at its peak. Leave the crayons outside for a few hours to give them time to melt. You might invite preschoolers to look at them every once in a while to observe the melting process and to talk with them about how the heat from the sun can change materials from solid to liquid! Once they are fully melted, bring the crayons back inside to cool. After the melted crayons have completely hardened, you can send them home with children to show to their parents or keep them in your classroom to use for future art projects!
Sunshine-themed Children’s Books & Activities 

5 Simple Outdoor Preschool Activities for the End of Summer